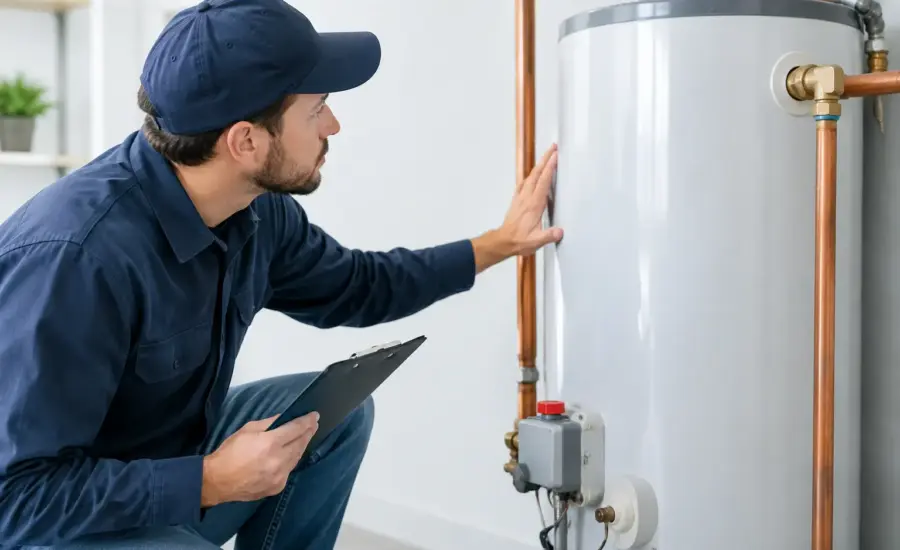
A water heater rarely fails without giving some warning first. A small puddle, rusty water, a popping sound, or a longer wait for hot water can all point to a problem that is cheaper to fix now than after a leak damages a floor or shuts down a business restroom. Learning how to inspect water heater equipment helps homeowners and property managers catch those signals early.
This is a visual and basic-function check, not a repair guide for gas lines, electrical panels, or sealed components. If you smell gas, see active leaking, notice scorched wiring, or suspect carbon monoxide, stop the inspection and contact a qualified local professional.
Start With a Safe Water Heater Inspection
Set aside 15 to 20 minutes when nobody needs hot water. Bring a flashlight, paper towels, and a phone or notepad to record the unit’s age, model number, and anything unusual. Avoid touching pipes or fittings that may be hot.
For a gas water heater, make sure the area is free of paint cans, gasoline, solvents, cardboard, or other combustible storage. The space around the unit should be clear enough for airflow and service access. For an electric unit, do not remove access panels or handle wiring. You can inspect the exterior, but electrical repairs belong to a licensed professional.
Begin by reading the manufacturer label. Find the installation date if it is listed, or record the serial number so a plumber can identify the age. Many tank-style water heaters last roughly 8 to 12 years, though water quality, maintenance, and usage can shorten or extend that range. Age alone does not prove replacement is needed, but it changes how seriously to take rust, leaks, and performance problems.
Check the floor, tank, and connections
Use your flashlight to inspect the floor around the water heater. Look for fresh water, damp insulation, mineral buildup, or rust stains. Wipe suspicious spots with a paper towel, then check again later. Condensation can occur in humid conditions, but recurring moisture needs an explanation.
Examine the tank’s outer shell from top to bottom. Surface rust near a pipe connection may be repairable. Rust or moisture coming from the bottom seam of the tank is more serious and often means the tank has failed internally. A tank leak cannot usually be patched reliably.
Next, look at the cold-water inlet and hot-water outlet on top of the unit. Check for green or white corrosion, drips, loose-looking fittings, and mineral deposits. Inspect nearby shutoff valves and the connected supply lines as well. Flexible braided lines can corrode or bulge over time, while older rigid pipes may develop slow leaks at joints.
If the water heater sits in a drain pan, check whether the pan is dry and whether its drain line is clear. A pan helps direct a small leak away from finished areas, but it does not make a leaking tank safe to ignore.
How to Inspect Water Heater Safety Parts
A few visible components deserve special attention because they protect the unit and the people around it.
Temperature-pressure relief valve
The temperature-pressure relief valve, often called the TPR valve, is typically located near the upper part of the tank. It has a small test lever and a discharge pipe that should run downward toward a safe location. That pipe should not be capped, plugged, or reduced in size.
A qualified plumber can test and replace this valve when needed. Homeowners may be able to perform a manufacturer-approved test, but there is a trade-off: an older valve can drip or fail to reseat after testing. If you are not confident in the unit’s condition, inspect the valve and discharge pipe visually instead, then schedule service. Never block the discharge pipe or attempt to modify it.
Temperature setting and controls
Check the thermostat setting. Around 120 degrees Fahrenheit is a common household setting because it limits scald risk and can reduce energy use. Some households may need a different setting, such as homes with specific sanitation needs, but hotter water raises the risk of burns. Property managers should also consider local requirements and the needs of occupants before changing settings.
For gas models, inspect the control area without taking anything apart. A steady blue flame is generally expected on units with a visible pilot or burner view window. Yellow flames, soot, scorch marks, or an extinguished pilot can indicate a combustion or venting issue. Do not try to adjust the burner yourself.
For electric models, look for water near the access covers, discoloration, or a tripped breaker. Do not open the covers. Water and electrical components are a dangerous combination, and a professional should diagnose the cause.
Venting on gas models
Gas water heaters need proper venting to carry combustion gases outside. Look at the metal vent pipe above the unit. It should be securely connected, slope appropriately toward its vent path, and show no obvious gaps, corrosion holes, or loose sections.
Pay attention to odors and symptoms in the building. A gas smell calls for immediate action: leave the area, avoid switches or flames, and contact the gas utility or emergency services from a safe location. Headaches, dizziness, nausea, or a persistent exhaust smell may also suggest a carbon monoxide concern. Leave the building and seek professional help rather than trying to troubleshoot ventilation.
Check Performance at Fixtures
A visual inspection tells only part of the story. Turn on hot water at one faucet and let it run for a minute. The water should heat consistently without strange odors, discoloration, or sputtering. Test a second fixture if possible.
Brown, red, or cloudy hot water may come from sediment, corroding internal parts, or old plumbing. A brief odor can sometimes be related to bacteria in the tank, but a persistent rotten-egg smell or metallic taste deserves professional assessment. If only hot water is discolored, the heater is more likely involved than if both hot and cold water show the same issue.
Listen while the heater recovers after hot water use. Rumbling, popping, or crackling can indicate sediment buildup at the bottom of a tank. Sediment is especially common in areas with hard water. Flushing a tank can help in some cases, but it is not always wise on an older, neglected unit because disturbing heavy buildup may reveal an existing weakness. Ask a plumber whether flushing, anode-rod service, or replacement is the better choice for the unit’s age and condition.
Also notice capacity. If hot water runs out much sooner than it used to, possible causes include a failing heating element, burner issue, broken dip tube, sediment buildup, or increased demand. A growing family, a new high-flow shower, or a commercial tenant’s changed operations may explain the difference, so compare the problem with recent water use before assuming the heater is at fault.
Record What You Find and Decide What Comes Next
Take clear photos of leaks, corrosion, labels, vent connections, and error codes. Note when the issue occurs, such as only during heating cycles or after multiple showers. This information makes a service visit more efficient and helps a local provider arrive prepared.
Call a qualified plumber or water-heater technician promptly for active leaks, tank rust, repeated TPR valve discharge, no hot water, discolored hot water, strange burner behavior, or frequent breaker trips. For gas units, combustion and venting concerns should be treated as urgent. If the heater is nearing the end of its typical service life, ask for repair and replacement estimates so you can compare the real cost of each option.
A quick inspection every few months is usually enough for a home unit. Multifamily properties, restaurants, salons, and other high-demand locations may need a more formal maintenance schedule because downtime affects more people and water use is heavier.
When you need service, look for a nearby provider with water-heater experience, appropriate licensing, and clear estimates. Bizbook Directory can help you find local plumbing professionals by service category and location. The right call at the first sign of trouble can keep a minor maintenance issue from becoming a flooded room or an unexpected replacement.